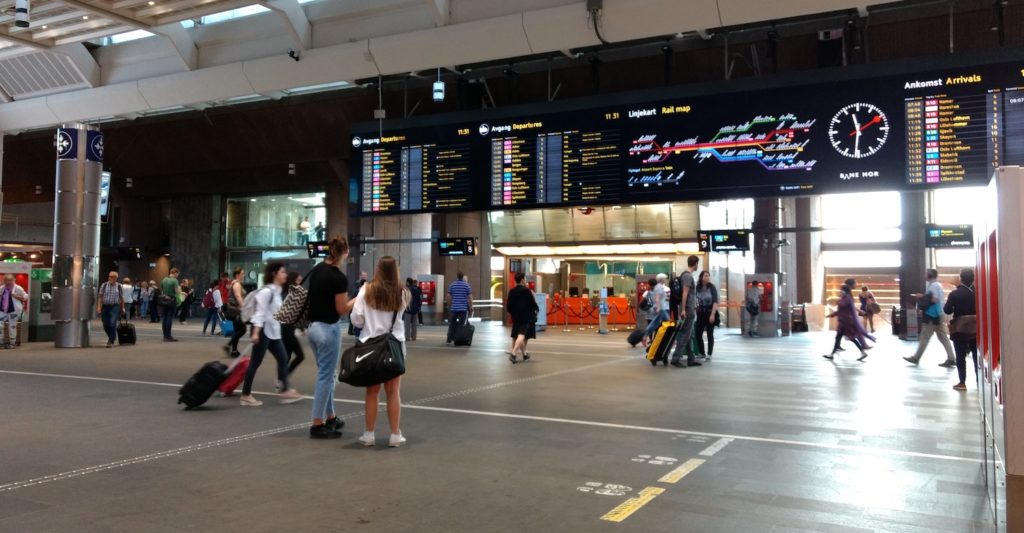
I’ve spent the last two weeks finishing my central station ambience recording project. I did a couple of stealth recording sessions back in 2011 and I’ve used the recordings in the studio quite often since then. I never got around to properly edit the files, so I decided to get it done now. I also wanted to record a little bit more to complete the collection.
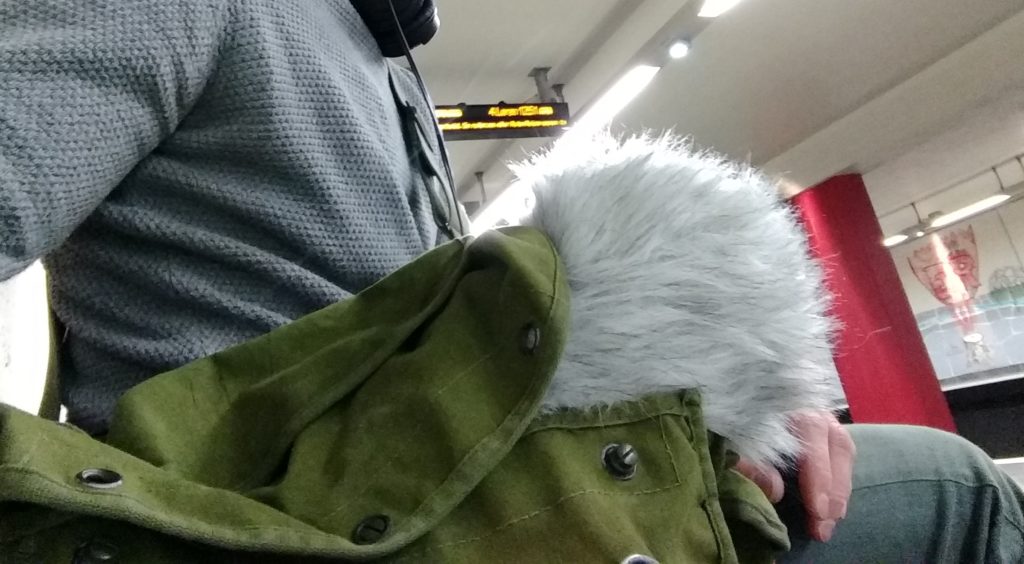
The first recording sessions were done using the stealth rig I wrote about in this post. It’s a fairly discrete and portable rig, but I still have room for a Sound devices 744 and a stereo microphone. I did experience some problems with wind noise because of the lack of proper wind protection. When I went out to do the final recordings I wanted to avoid this, so I sacrificed some stealthiness for better protection.
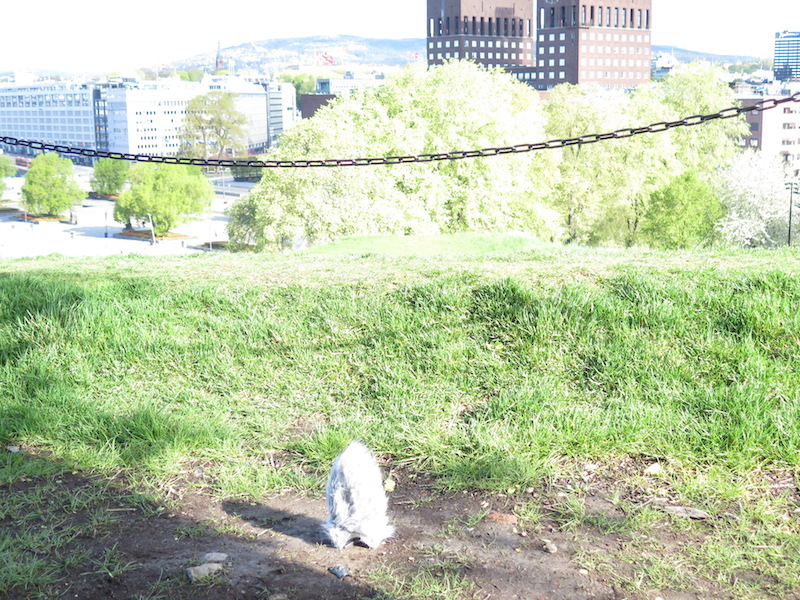
Yep. That’s a full windshield with wind jammer stuffed into a bag. Not extremely stealthy, but I figured I could get away with it if I positioned myself well and tried to look inconspicuous.
I recorded for about an hour without anyone asking “is that a microphone” or “are you recording”, so my not-so-stealthy stealth rig worked well enough. When I had gathered all the material I felt I needed, I took a last walk around to see if there was anything else to record. A security guard decided to have a chat with the weirdo with the strange dog in his bag. That was the end of my recording session for the day.
Back in the studio I finally edited all the recordings and put together an easier to use collection of sounds. Because I did the recording in several sessions on different days and at different times, the sounds cover pretty much all my needs.
I’ve decided to make the final product available through Norsonant. I’ll add a link here when it’s available.
I’ve wanted to record waves for a long time, but it seems to be hard to find good locations. Other people like to be on the beach, too, and they’re noisy. There’s also the eternal challenge of avoiding traffic noise and noise pollution from air traffic. Getting far enough away from civilization can be hard. This applies to many other types of sounds, of course, not just waves.
I’ve been lucky enough to spend many vacations up north in Norway. Last summer I was able to schedule a few days for field recording. Not far away from our usual vacation spot lies Senja, the second largest island in Norway. Senja checked many of the boxes that would make it easier to get some good wave recordings:
Small population, easier to record without getting disturbed
Little to no car traffic
Far from busy air traffic routes
Varied surfaces. You’ll find sandy beaches, pebbles, rocks of various sizes and cliffsides
Recording on different sides of the island allows for different sized waves. The side closest to the mainland has smaller waves. The side that’s exposed to the Norwegian sea usually has bigger waves.
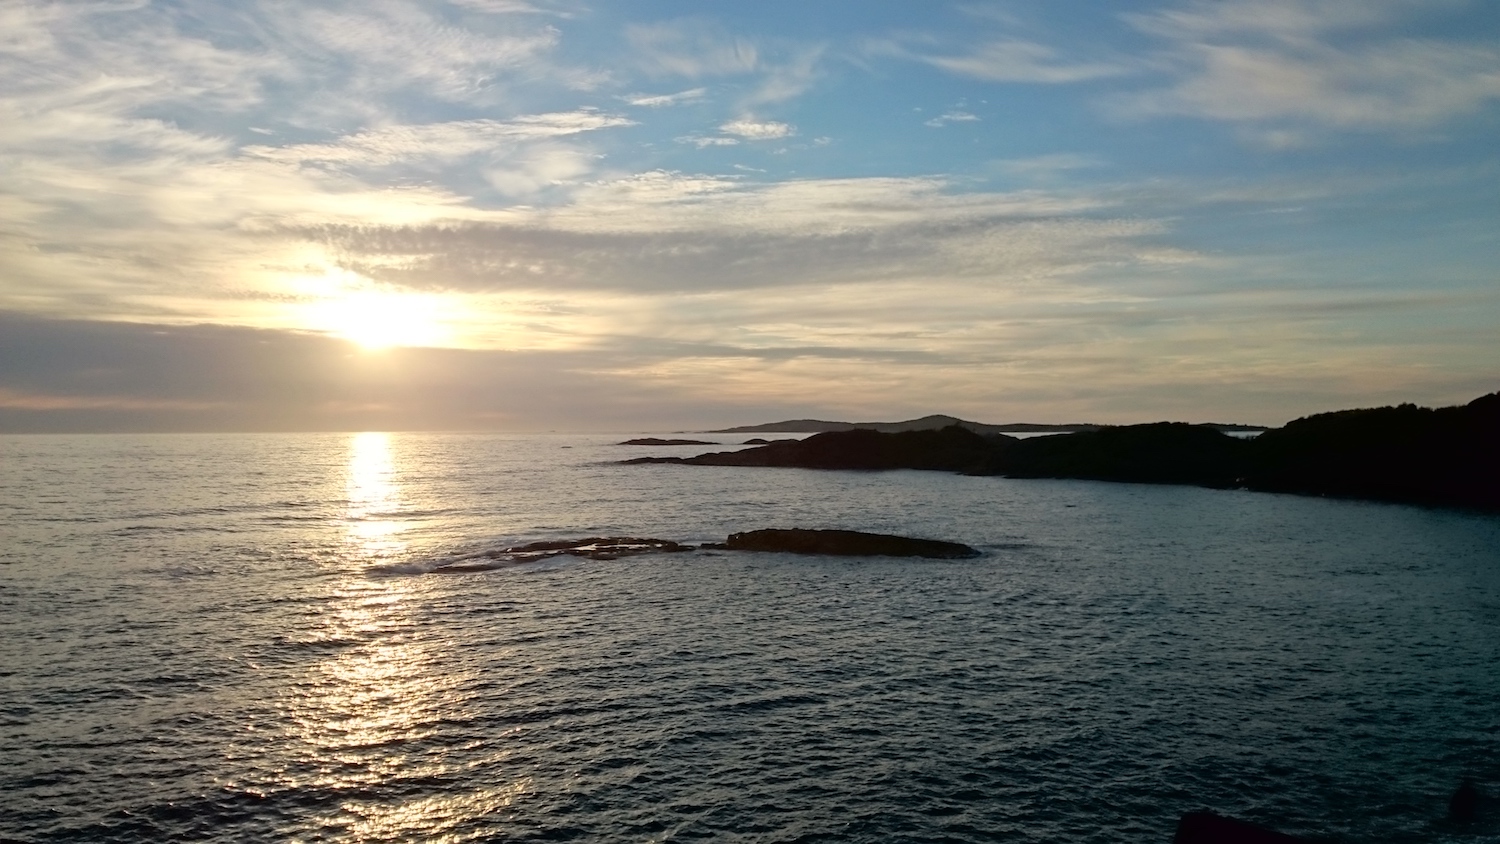
Sunset viewed from Senja
Goals
I had a few goals for this session. I wanted to get as much variation as possible to make this collection more flexible and give myself and my colleagues more options in the mix. What I wanted was:
More than one mic setup. I want to capture details as well as a more diffuse, less specific/narrow sound of waves
Close up as well as distant perspective. I often struggle to find recordings of distant waves in other sound libraries
Different surfaces and different wave sizes
Gear
Since I was planning to do this during my vacation, I had to put together a small and portable that would let me accomplish my goals. My go-to recorder is the Sound Devices 744T. Pairing it with a Sound Devices 302 would give me four separate channels. That’s enough for two stereo pairs.
I usually use external NP1-batteries, but decided to use a Sony-style battery to save space and weight. The Sony-style battery fits directly in the slot on the SD 744T. I use a Duracell DRSF970, which gives me plenty of recording time without recharging. The SD 302 runs forever on a set of AA batteries.
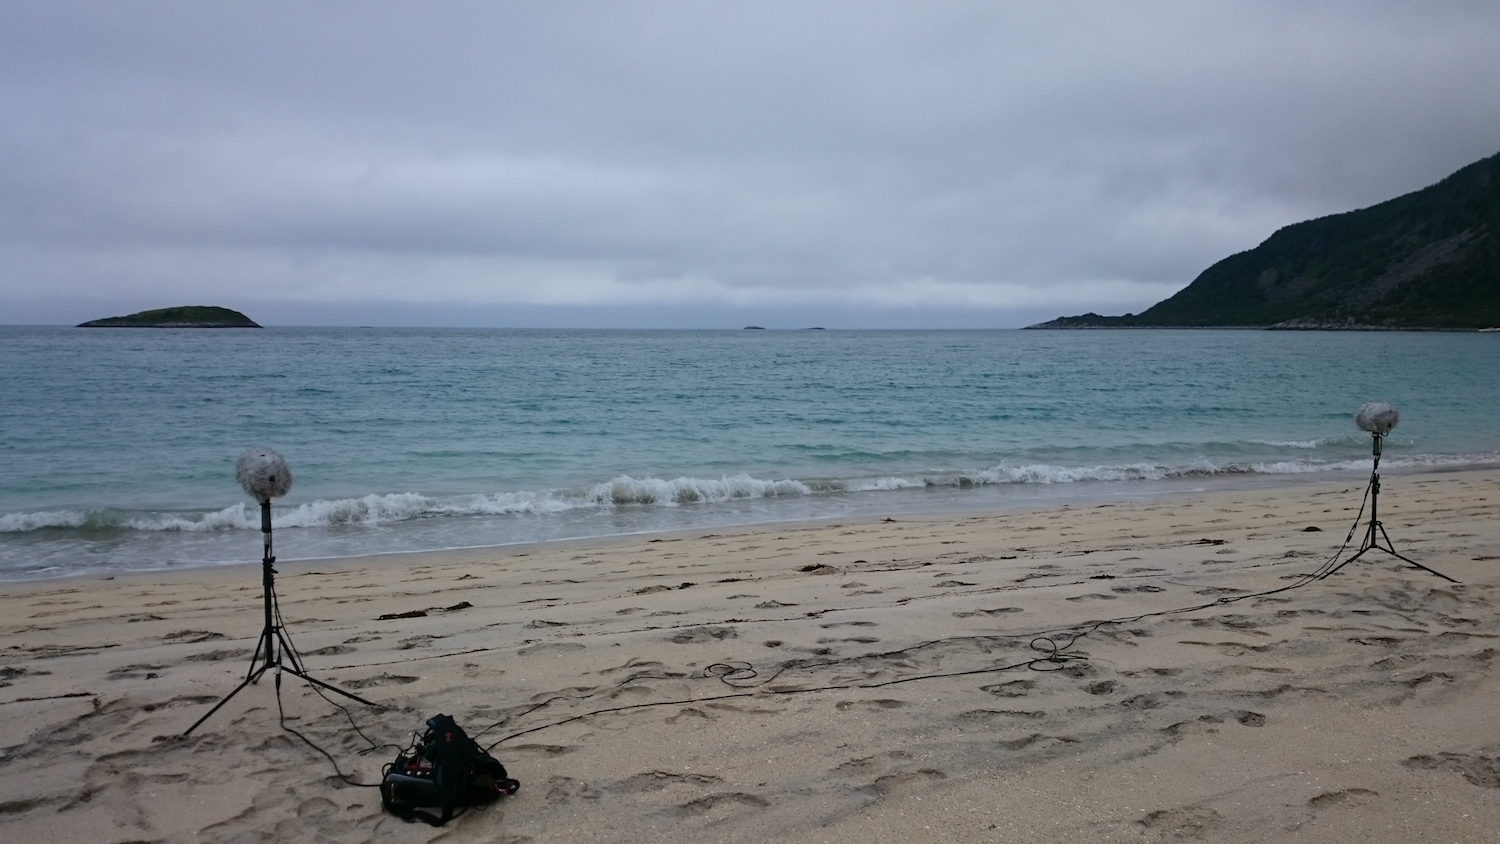
I also needed to bring some microphones. I like my Line Audio microphones. They sound good, they’re small and they are pretty cheap. The low price is a plus when the plan is to expose them to salt water. The plan is always to keep the equipment dry, but who knows what’ll happen when you’re recording close to the sea. I brought two Line Audio OM1s (omni) and two Line Audio CM3s (cardioid). The plan was to aim the cardioid mics to pick up as much detail as possible while using the omnis to get a more diffuse, or wider, sound.
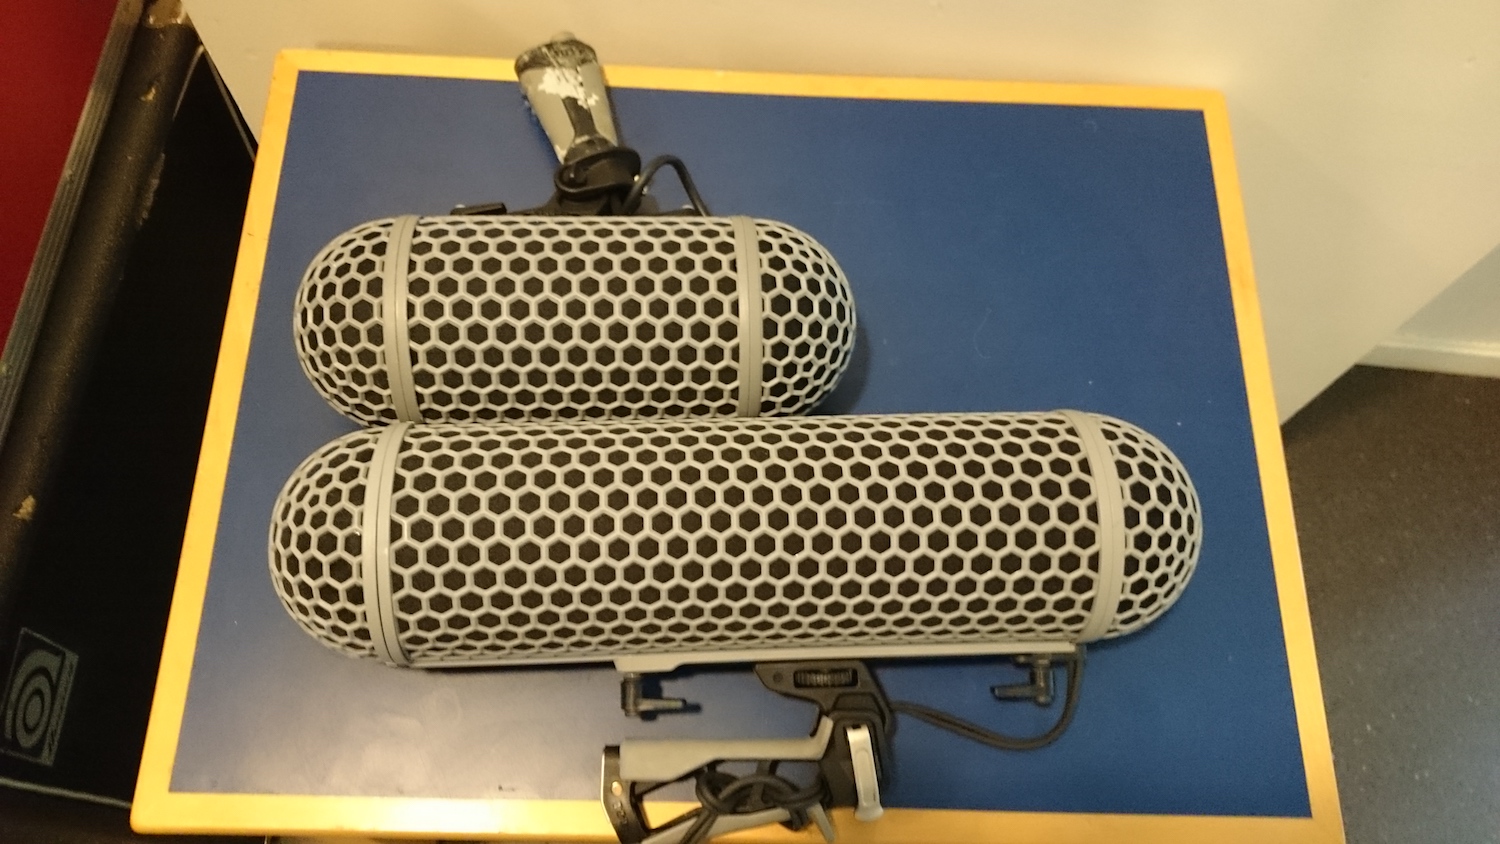
The microphones would, of course, need wind protection. The Line Audio mics are small and I can easily fit two inside one windshield. So, one CM3 and one OM1 in each windshield gives me two stereo pairs using only two windshields. To save even more space, I decided to bring my modified Rode blimps. They’re short and pretty compact (I stole the idea from Watson Wu). Paired with the Manfrotto Nano lightweight mic stands, this is a pretty compact and light setup.
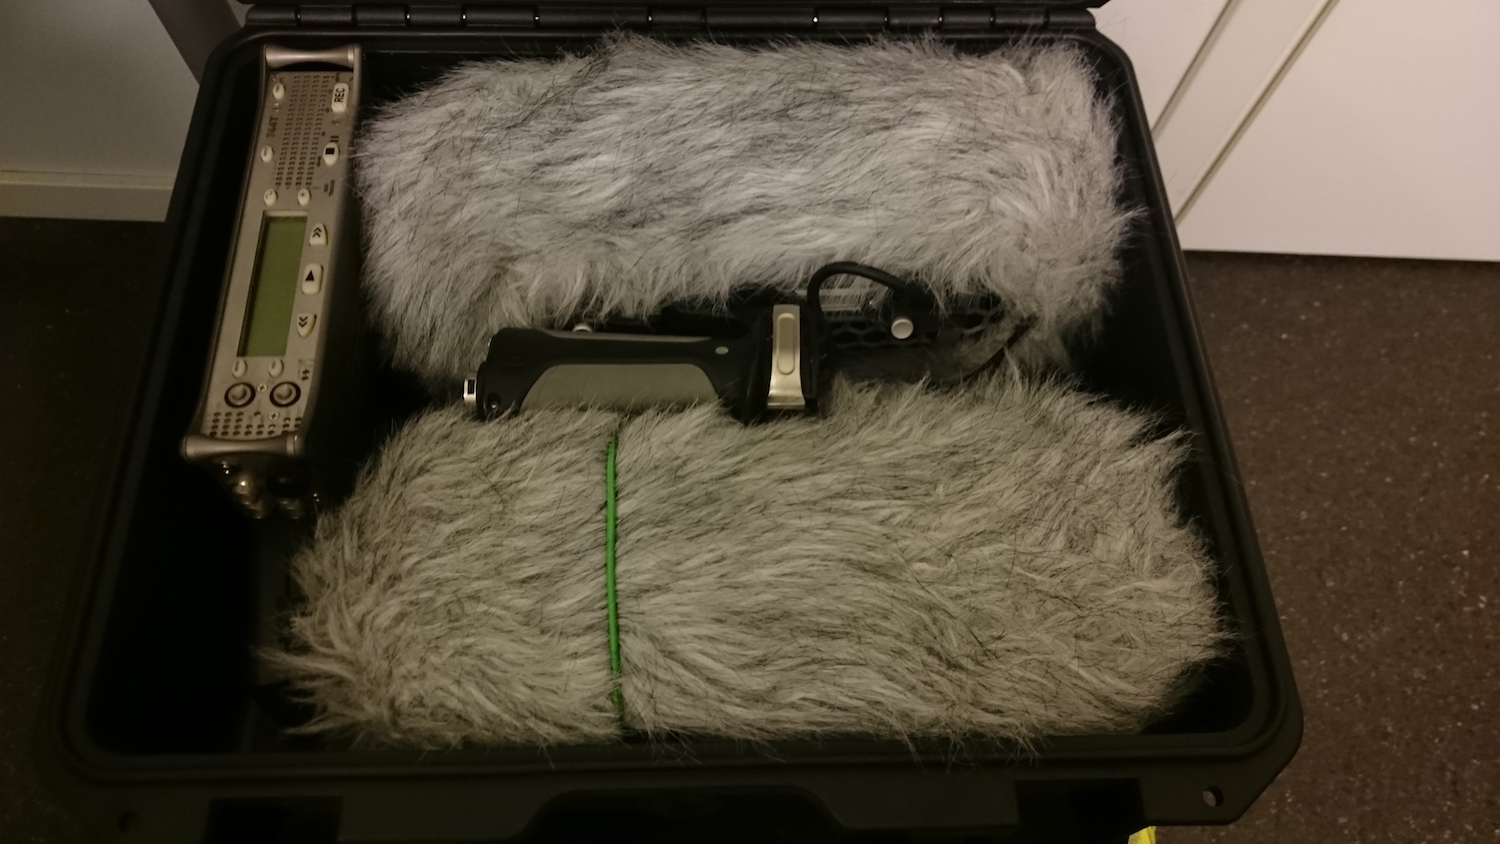
Regular Rode blimp next to my shortened version.Two shortened blimps and the SD744T in a small Pelicase knockoff
Location research and scouting
Now that I had a good, compact kit, it was time to do some location research. The research started at home using Google maps. I like to use Google maps and satellite images to get an idea of how to get to an area and what it’ll look like when I get there. The regular map helps me figure out how to get close by car. The satellite images gives me an idea of how easy it’ll be to haul the recording gear from the car to the actual recording location. In this case, I would be able to get pretty close by car, so I wouldn’t need to bring boots for super rough terrain or a huge backpack to carry the gear. I could just throw my Petrol bag over my shoulder, carry it to the beach and then go back to the car get the mic stands and windshields.
The first day up north I spent just driving to possible recording locations. I like to physically scout the locations without bringing the gear, if I can. I’ve found this to save time in the long run. I want the days I do the actual recording sessions to be as effective as possible. Driving to a useless location is just a huge waste of time. It turned out that a few of the locations i had found on the map were inaccessible because of fences or “no trespassing” signs. This was not visible on the map or satellite images, so there was no way of knowing without going there. Other locations were too close to fishing towns that were surprisingly noisy, both due to industrial noise and the large number of seagulls. After a day of scouting, I had a good number of locations ready for the recording session.
I decided to spread the recording session over three days. This allowed me to do a lot of the recording early in the morning and avoid tourists and other noisy visitors. It also let me record different sized waves due because the weather and wind conditions were different each day.
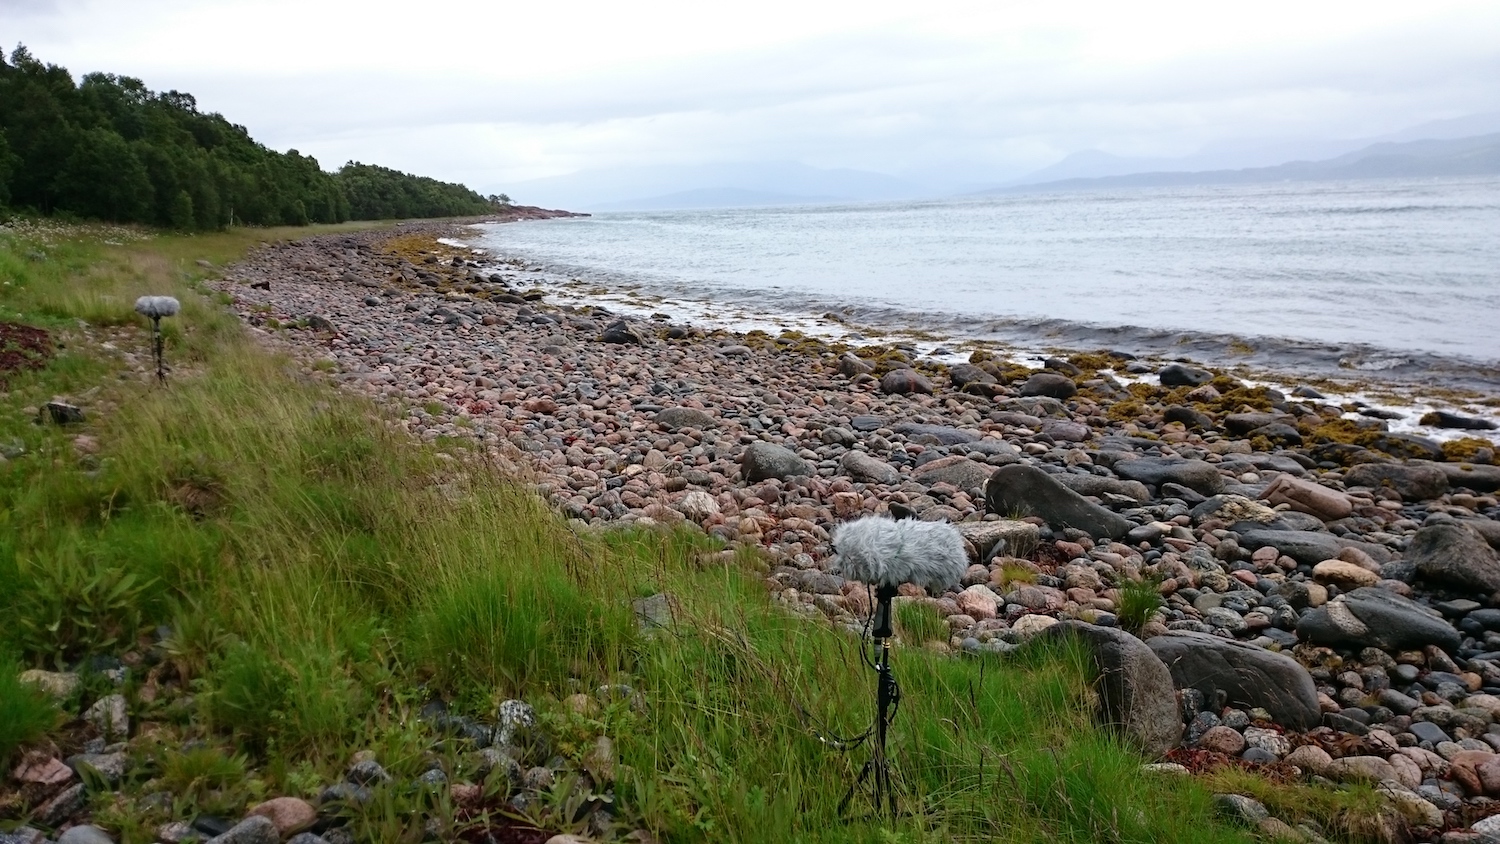
Smaller waves
Lessons learned
All in all the recording sessions themselves went very well. I was pleasantly surprised by the lack of birds and bird calls in the recording locations. I only had trouble in two places and I was able to salvage those recordings in post. I have a few things I will do differently the next time:
The coast can be very windy. Although I’ve used the Rode blimps in very windy conditions before, I struggled in quite a few of the recording locations. The next time I’ll make sure to bring an extra layer of wind protection, like a Rycote hi-wind cover. I’ve written more about recording in windy conditions in this blog post.
If I had unlimited space in my suitcase, I would have brought a large bag with enough space for all the gear. An optimal setup would be a large bag with room for the recorder and mixer inside and somewhere to strap the mic stands and windshields outside. This would reduce the setup time on each location. It would also eliminate the need to disconnect the cables every time I change location. In wet and sandy conditions, you don’t really want to disconnect anything and risk getting sand or salt water inside the XLR connectors. Because I didn’t bring a large backpack, I had to disconnect every time. I didn’t have any problems because of it, but I could easily have had problems.
After releasing the Norsonant library “Windy forest” I saw a lot of comments online about wind being challenging and difficult to record. I don’t disagree, but I’ve picked up a few tricks over the years that help. Most of them are pretty basic, but if you know about them all it adds up and makes things easier.
Let’s start with a list of tips and then we’ll get into details.
Correct microphone placement in the zeppelin
Use extra layers of wind protection
Use natural cover
Aim the microphones at something
Keep the microphone stand from tipping over
Record long takes
Correct microphone placement in the zeppelin
The zeppelin works by creating a volume of still air around the microphone. For this to work properly there needs to be a little bit of distance between the microphone diaphragm and the zeppelin. I’ve seen people push the microphone all the way to the front of the zeppelin to get as close as possible to the sound source. This means that there is very little room front of the microphone and reduces the effect of the zeppelin. I generally leave as much room in front of the microphone as between the microphone and the sides of the zeppelin.
This tip only applies to microphones with the diaphragm near the front, like a Sennheiser MKH 50 or a Rode NT5. If you’re using a shotgun microphone, the design of the microphone itself will keep the diaphragm from getting close to the front end of the zeppelin.
Use extra layers of wind protection
You’re used to using a furry wind jammer to protect the microphone from the wind, but sometimes that’s not enough. I’ve tested a different ways of adding wind protection.
The most professional solution is the Rycote Hi wind cover. The Hi wind cover is made of a fleece material that slides over the zeppelin. The wind jammer goes over the Hi wind cover. The fleece material gives you an extra layer of wind protection and this has been a life saver for me many times.
The low budget solution is using a second furry wind jammer as an extra layer. Just slide an extra wind jammer over the one you’re already using and that will give the microphone some extra protection. This works, but not quite as well as the Hi wind cover.
Use natural cover
Unless you’re recording in a wide open field or something like that, you can probably find some natural cover that will help protect you and the microphone from the wind. If you’re in the city you can try to get behind a house or wall. In the forest you can find lower ground, a small valley or hide behind a big rock.
If all else fails you can position yourself between the microphone and the direction the wind comes from and use your body as wind protection. This naturally won’t work if you’re wearing loose clothing or anything that will flap around in the wind.
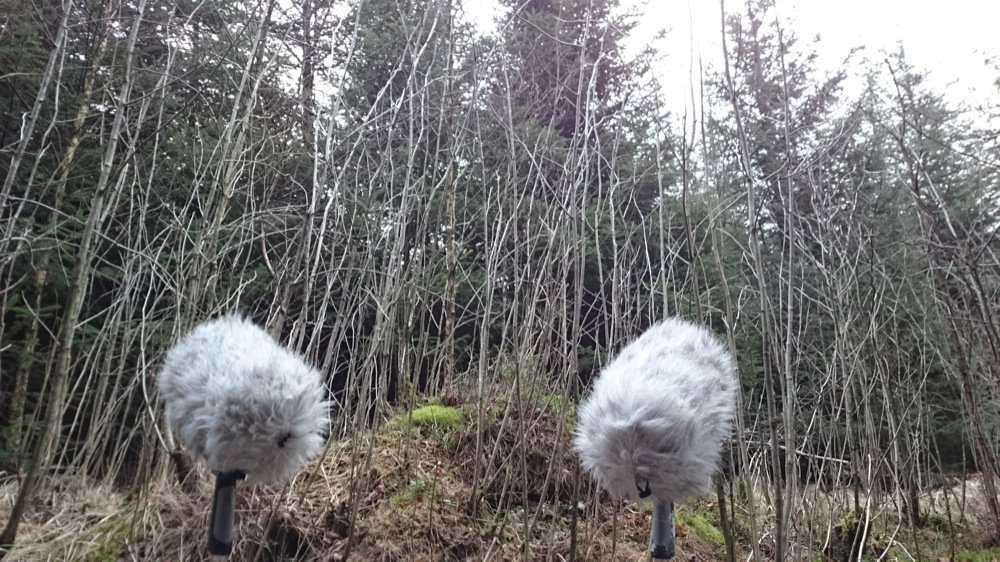
Aim the microphones at something
The air that the wind moves is not very interesting in itself. Don’t just aim the microphones at the horizon. Try to aim them at something that the wind interacts with. Aim them at a tree, straight down at the grass, at the rusty gate or at the hole in the wall that makes the wind sing. This is the same principle as when recording rain. Thousands of rain drops is just white noise. You are looking for the details that make it sound interesting.
Here’s an example from the Windy forest library. I’ve pointed the microphones straight down to capture the sound of grass moving in the wind.
Keep the microphone stand from tipping over
This should be pretty obvious, but I know I’ve let my microphone stand tip over many times. Shame on me. Zeppelins break and so do microphones, so be careful.
Keep your foot or hand on the stand
Place something heavy on the base of the stand
Keep the stand low to decrease the chance of it tipping over
Record long takes
Even if you are very careful, you’ll probably get some wind distortion on your recordings. Long takes make the editing process a lot easier. Instead of having to low cut away wind distortion you can just cut away the entire section and still have plenty left to work with.
Sometimes you want both clean wind sounds and dirty, distorted wind sounds. Long takes will give you more to choose from.
My feet were soaking wet. A strong wind blew across the flat terrain around me and the sun was still slowly working its way up from behind the mountains. This was going to be a cold day at work.
In this blog post I’ll tell you about the pre production and recording of the sound effect library “Wind turbine” for Norsonant as well as the equipment I used.
In December 2015 I decided to try to record some wind turbines. After doing a bit of research online I found two nearby sites with wind turbines. One is a large area with more than ten turbines near a road, so it’s easily accessible. The other is a smaller area with only two turbines, further away from civilization. After carefully checking maps and satellite images, I hiked out to the smallest site to do some location scouting.
If possible, I like to go out on location before the day I actually plan to record. It just makes everything easier. Using maps and satellite images can tell you a lot, but nothing beats going there in person. When location scouting I can use my ears to listen for potential problems and decide how to best avoid them. Sometimes I need to bring extra gear to help me get rid of the problems. Sometimes I need to find a different recording location. Without taking the time to scout the location I wouldn’t know. In this particular case I wasn’t which route to take to get to the wind turbines. I’d rather get lost and walk for hours without carrying lots of microphones, stands and other gear.
At the site I found a few challenges I had to overcome, but all in all it was a good location. The biggest problem was that there were two wind turbines pretty close together. I found a good spot for the microphone that would let me isolate one of the turbines enough to make it work. There was a bit of noise from distant traffic, but recording early in the morning should solve that. I also found out that the road nearby was open, not closed by a barrier like the map said. This meant that I could drive to the other side of the area, park my car a lot closer than I thought and save myself from a lot of unnecessary walking. The location scouting trip was already worth it.
I prepared my recording gear the evening before the session. Since I was going to walk to the recording location I wanted to travel light. I’ve fallen in love with the Manfrotto Nano stands as they are super light and can be folded to fit in a backpack. This session would be the first test for my shortened Rode blimps, or “mini-me” blimps, as Watson Wu named his in the blog post I stole the idea from. In the blimp I placed my recently purchased Line Audio CM3 microphone. The recorder was, as always, my Sound Devices 744T. This setup is very small and light, so I was not worried about the weight of the backpack for the hike the next day.
Recording day. I got up early so I could get to the location before traffic started picking up. The wind shook the car, so I started looking forward to listening to fast spinning rotor blades. I drove the car as far as possible and walked from there. It was a windy, but dry day, so I had chosen to wear sneakers. Oh boy, what a mistake that was. Since I was approaching from a different direction, I had to cross a mire. Long story short, that wasn’t happening without getting my feet wet, but I was set on getting the recording done.
When I got to the turbine I had decided to record I set up the gear as quickly as I could. They tend to place wind turbines in areas with plenty of wind, so my wet feet were starting to get cold. I recorded from a few different positions to capture different distances. I also wanted to try to get different intensities, so I recorded long takes to give the wind a chance to change. The final position was right next to the turbine, about a meter away. I extended the microphone stand all the way to get as close as possible to a vent from that let sound pass through from the generator room. The wind was so strong that the wind tipped over the stand several times. The blimp hit the concrete so the microphone loosened from the suspension and got shook around pretty good. Both the microphone and the blimp survived the fall, so all was good.
I walked away with pretty cold feet, but some good recordings after a two hour session. On the trip back, I took a detour to scout the other wind turbine location. Unfortunately this area was too close to main roads and the airport, so I quickly decided that there was no point in recording there.
Lessons learned:
Location scouting can save you hours of walking.
Keep your hands on the microphone stand when recording in strong winds. It only takes a second and a strong gust to tip it over.
The Rode wind jammer works surprisingly well and I’m very happy with it. I still wish I had brought a Rycote Hi wind cover to protect the microphone from the strongest gusts.
The shortened Rode blimp, or mini-me, is awesome and pretty easy to make.
Yesterday I found out that a gig that was booked for this morning wasn’t going to happen. Trying to find something constructive to spend my free time on, I remembered that the armed forces usually fire off a canon salute during liberation day. I checked the newspaper and the web and found this to be true also this year. I’ve never watched the canon salute at the fortress before, so I left the studio to go location scouting.
At Akershus fortress I first went by the visitor center to check when the salute was happening, where it was happening and if I would need and could get permission to record. Some of the questions a field recordist may ask can sound like questions from a weirdo to other people. Especially my “how close can I get to the guns when they are firing” question raised a few eyebrows. Unfortunately I couldn’t get a good answer about permission to record and it was too late to get a hold of whoever was in charge of making those decisions. I just had to go there the morning after and hope for the best. I was unsure if I should bring a full recording kit or the stealth rig, but decided to go for a full kit. I walked over to the cannon area, had a quick look around to find a good position and left for home.
Apart from the possibility of being tackled by the military police, I had a few other worries. When I got home and started doing more research online it became clear that the scheduled time for the salute was either 9 am or at noon. I found contradicting information on official websites, so I just had to get there early to be sure not to miss it. I also found out that the cannon area I had scouted was the wrong one.. The correct place had a bigger surrounding area allowing for more flexibility for microphone placement, but it was also big enough to let a large crowd gather. Cheers and applause from an audience is not on my wishing list, but what can you do when it is a public event. I decided to look at this as valuable practice for when I get to do a controlled cannon recording sometime in the future. I’ve never recorded cannons before, so even if the sounds were ruined by the crowd at least I’d get some experience for next time.
Because some of my gear is currently out on a shoot, I just packed what I had on hand. The rig I brought consisted of my Sound Devices 302 mixer + 744T recorder, a Rode NT4 stereo mic and a Shure SM58 dynamic mic. I also brought my Zoom H2 as a backup.
I arrived at Akershus fortress about 25 minutes before 9. All gates but the main one are closed that early, so I had to take a detour to get to the cannon area. When I got there I ran into a couple of MPs who were guarding the site. They didn’t see any harm in letting me record the sound of the cannons, so they let me pick a position pretty close to the action. The clock was getting close to 9, so I set up quickly to make sure I was ready.
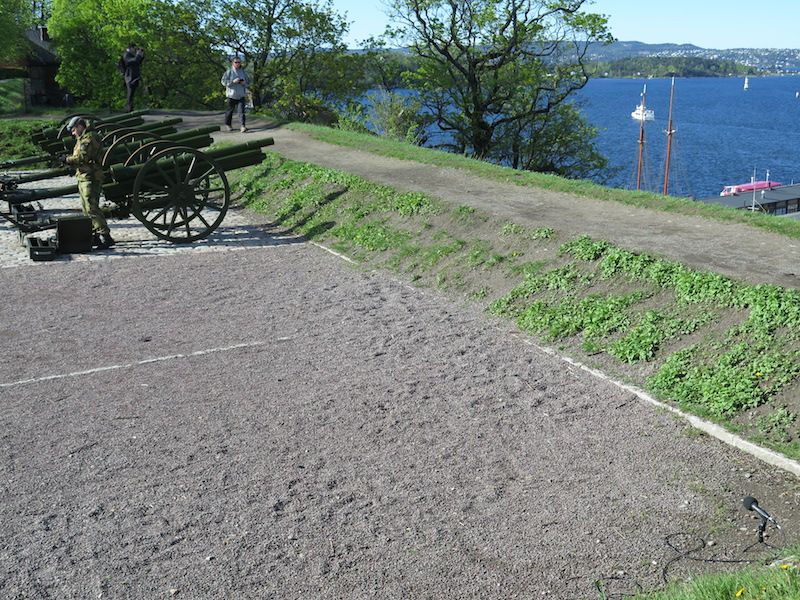
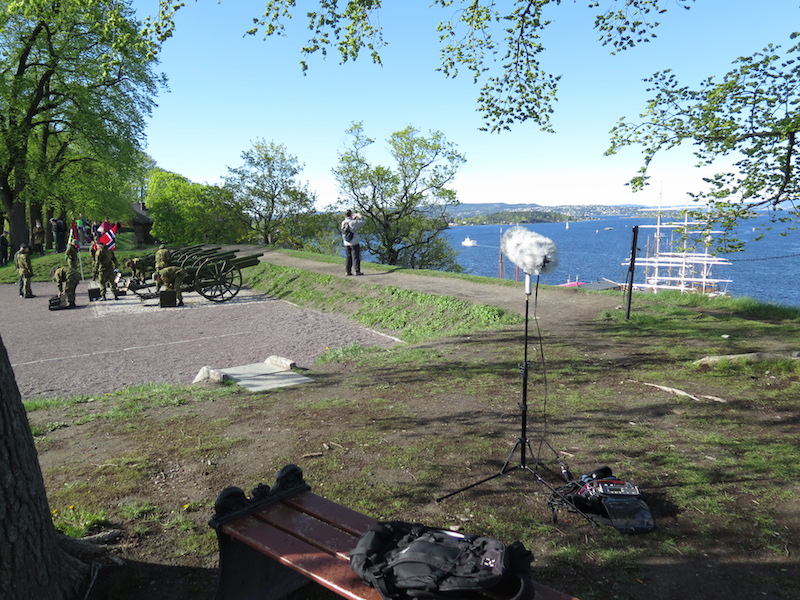
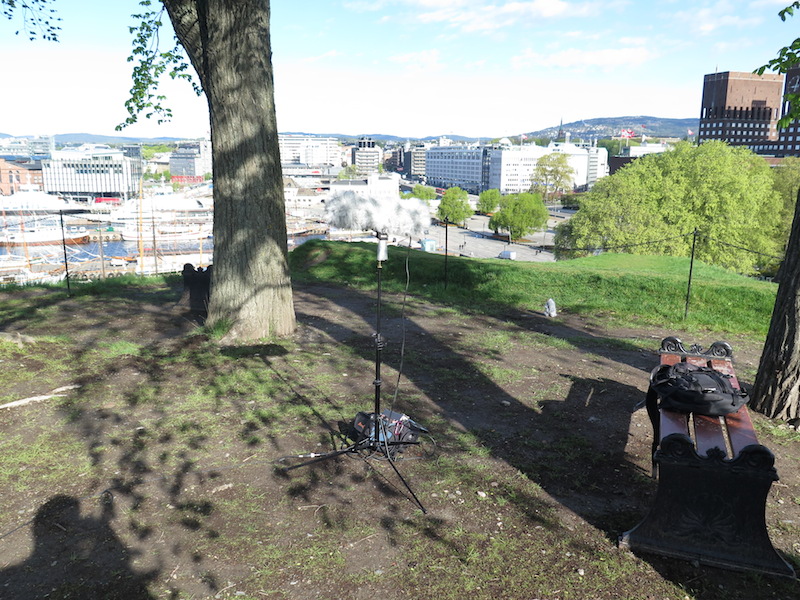
I placed the Shure SM58 about 5 meters from the closest cannon, 90 degrees to the right of the barrel. The Rode NT4 was placed about 10 meters from the closest cannon, a bit further behind the barrel. I found a place behind me for the Zoom H2. About 15 meters from the closest cannon, facing away to capture the slapback from the city buildings.
SM58 facing the cannonsRode NT4 a bit further backZoom H2 facing away from the cannons, completely covered by the wind jammer.Rode NT4 and recording rig. Zoom H2 in the background.
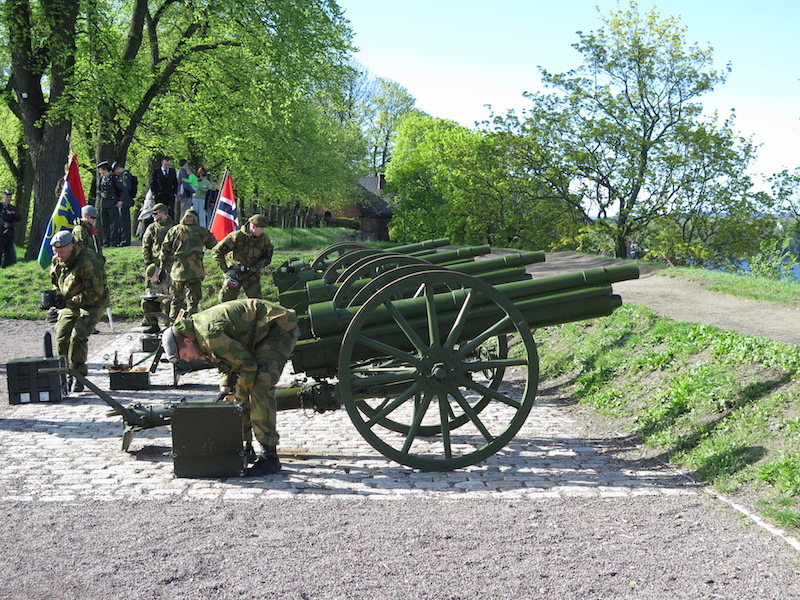
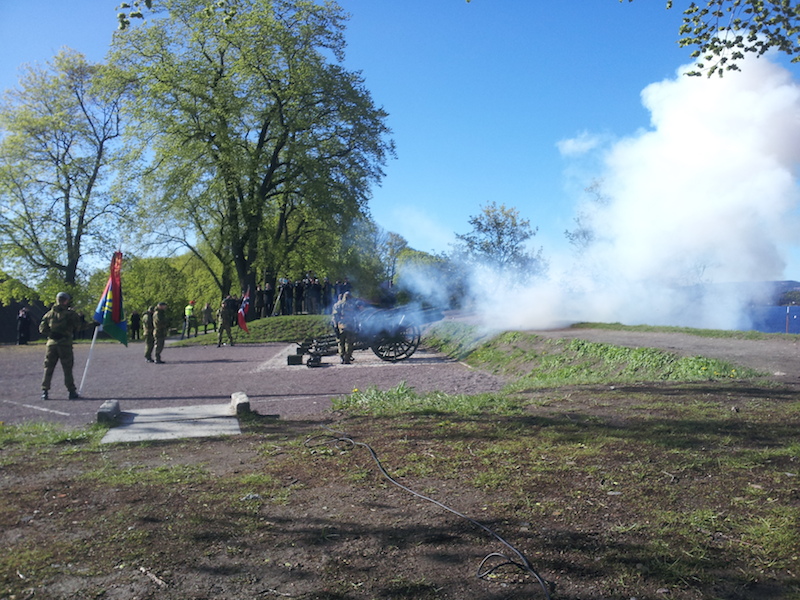
No crowd in sight, just a few photographers and reporters on the far side of the cannons. Everything looking good. I see the artillery soldiers approaching and I hit record. Immediately 744 display flashes “slow” next to the CF indicator. My CF card decided to crap out on me. I had no time to change cards and I was recording to both CF and HDD, so I crossed my fingers and let the recorder run.
Ready! Fire! I feel the shock wave and see the limiters on my equipment engage before everything is covered in smoke. After 21 shots, it’s over.
I pack up my gear and rush back to the studio to listen properly. My CF card is messed up and has only recorded a few seconds of audio. Very strange since this is a card I’ve used many times. Hopefully it’s a problem that a quick reformatting will fix. i will be testing that later. The files on the HDD are fine, so no worries. The recording sounds pretty good. The SM58 did not deliver what I had expected from a mic that close to the cannons. The Zoom H2 really delivered and sounded a lot better than I had expected. I can definitely get something good sounding out of this raw material. I’ve uploaded some samples and a few quick mixes to give you an idea of what can be done with a pretty basic setup like this. The playlist includes the raw recordings of all microphones with no processing. I’ve only normalized the tracks. I’ve also included some quick mixes with different variations of limiter use on the tracks. Enjoy!