I’ve wanted to record waves for a long time, but it seems to be hard to find good locations. Other people like to be on the beach, too, and they’re noisy. There’s also the eternal challenge of avoiding traffic noise and noise pollution from air traffic. Getting far enough away from civilization can be hard. This applies to many other types of sounds, of course, not just waves.
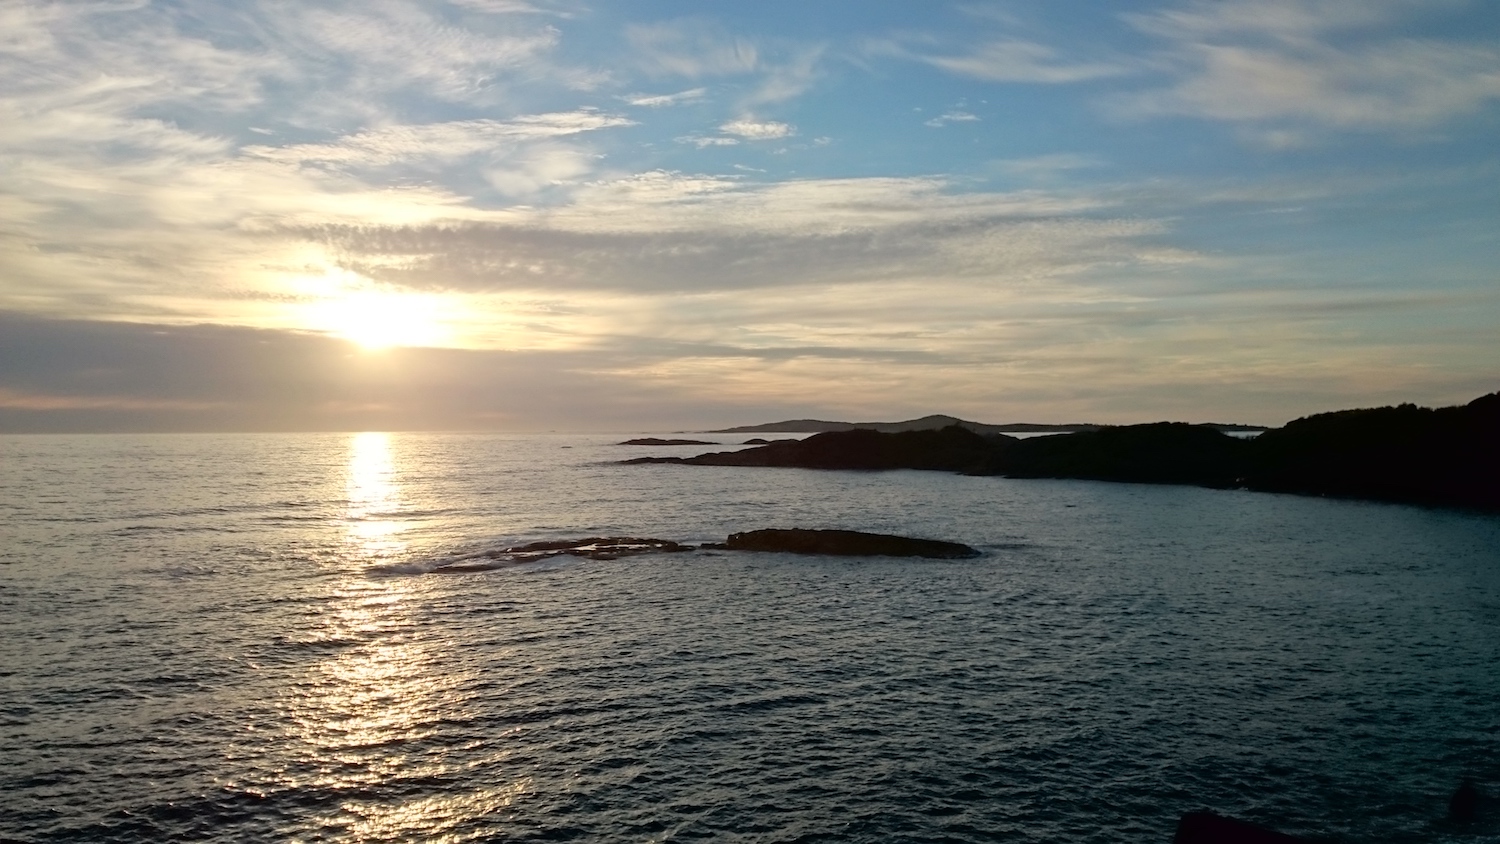
I’ve been lucky enough to spend many vacations up north in Norway. Last summer I was able to schedule a few days for field recording. Not far away from our usual vacation spot lies Senja, the second largest island in Norway. Senja checked many of the boxes that would make it easier to get some good wave recordings:
- Small population, easier to record without getting disturbed
- Little to no car traffic
- Far from busy air traffic routes
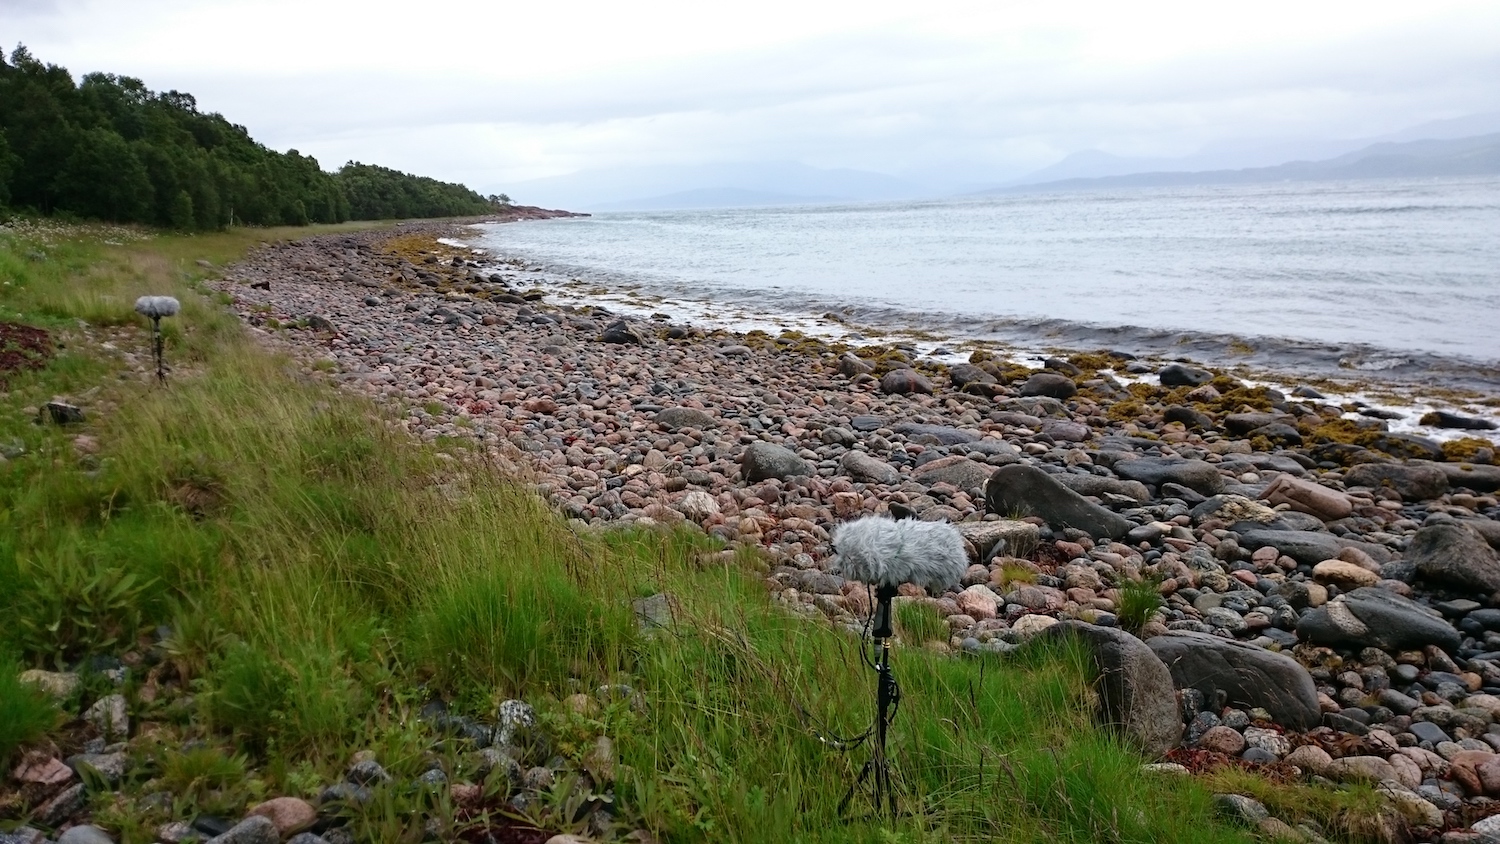
- Varied surfaces. You’ll find sandy beaches, pebbles, rocks of various sizes and cliffsides
- Recording on different sides of the island allows for different sized waves. The side closest to the mainland has smaller waves. The side that’s exposed to the Norwegian sea usually has bigger waves.
Goals
I had a few goals for this session. I wanted to get as much variation as possible to make this collection more flexible and give myself and my colleagues more options in the mix. What I wanted was:
- More than one mic setup. I want to capture details as well as a more diffuse, less specific/narrow sound of waves
- Close up as well as distant perspective. I often struggle to find recordings of distant waves in other sound libraries
- Different surfaces and different wave sizes
Gear
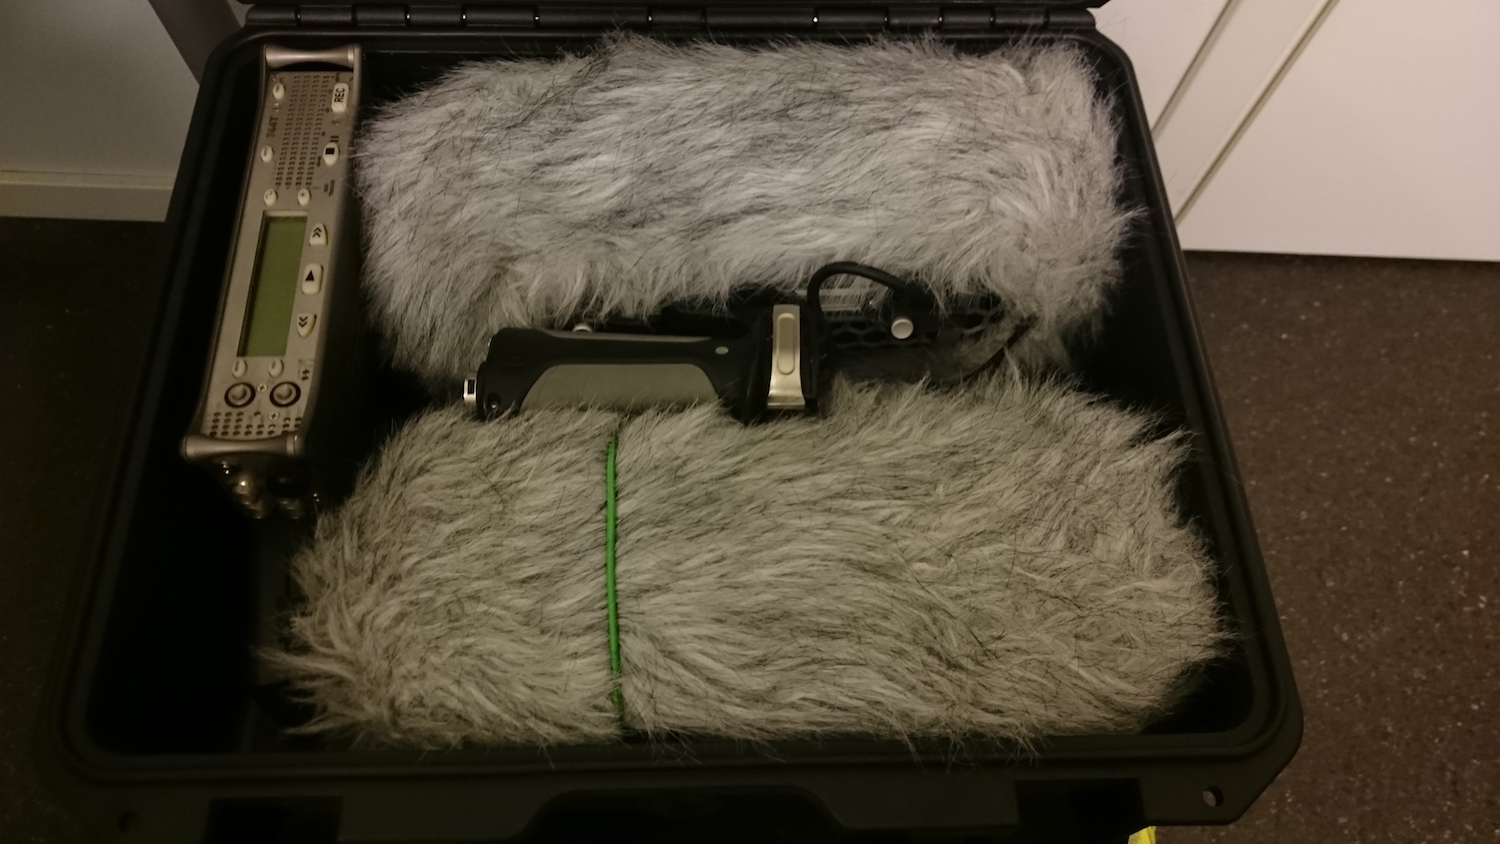
Since I was planning to do this during my vacation, I had to put together a small and portable that would let me accomplish my goals. My go-to recorder is the Sound Devices 744T. Pairing it with a Sound Devices 302 would give me four separate channels. That’s enough for two stereo pairs.
I usually use external NP1-batteries, but decided to use a Sony-style battery to save space and weight. The Sony-style battery fits directly in the slot on the SD 744T. I use a Duracell DRSF970, which gives me plenty of recording time without recharging. The SD 302 runs forever on a set of AA batteries.
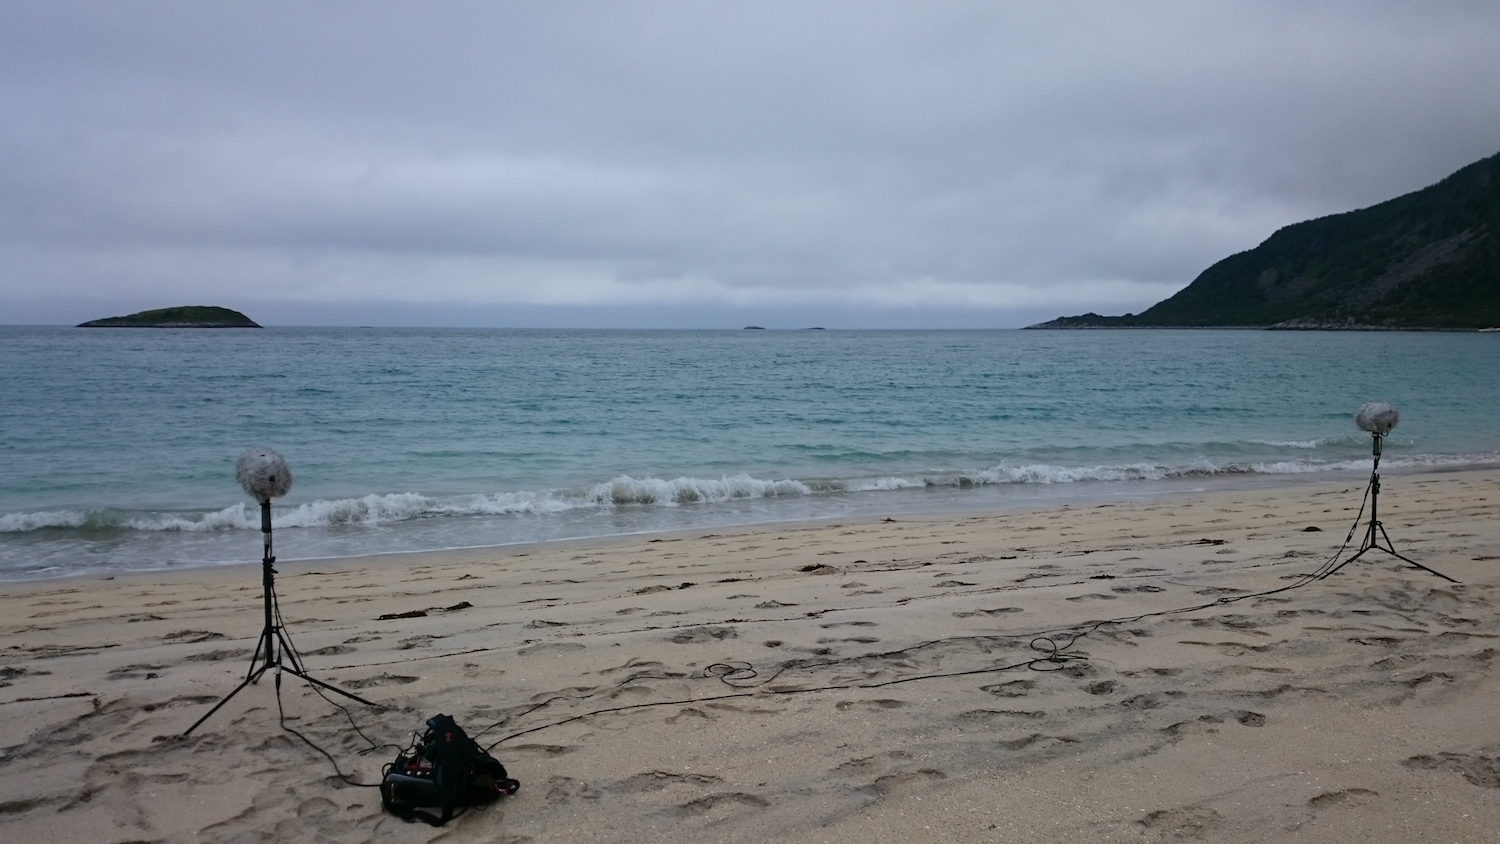
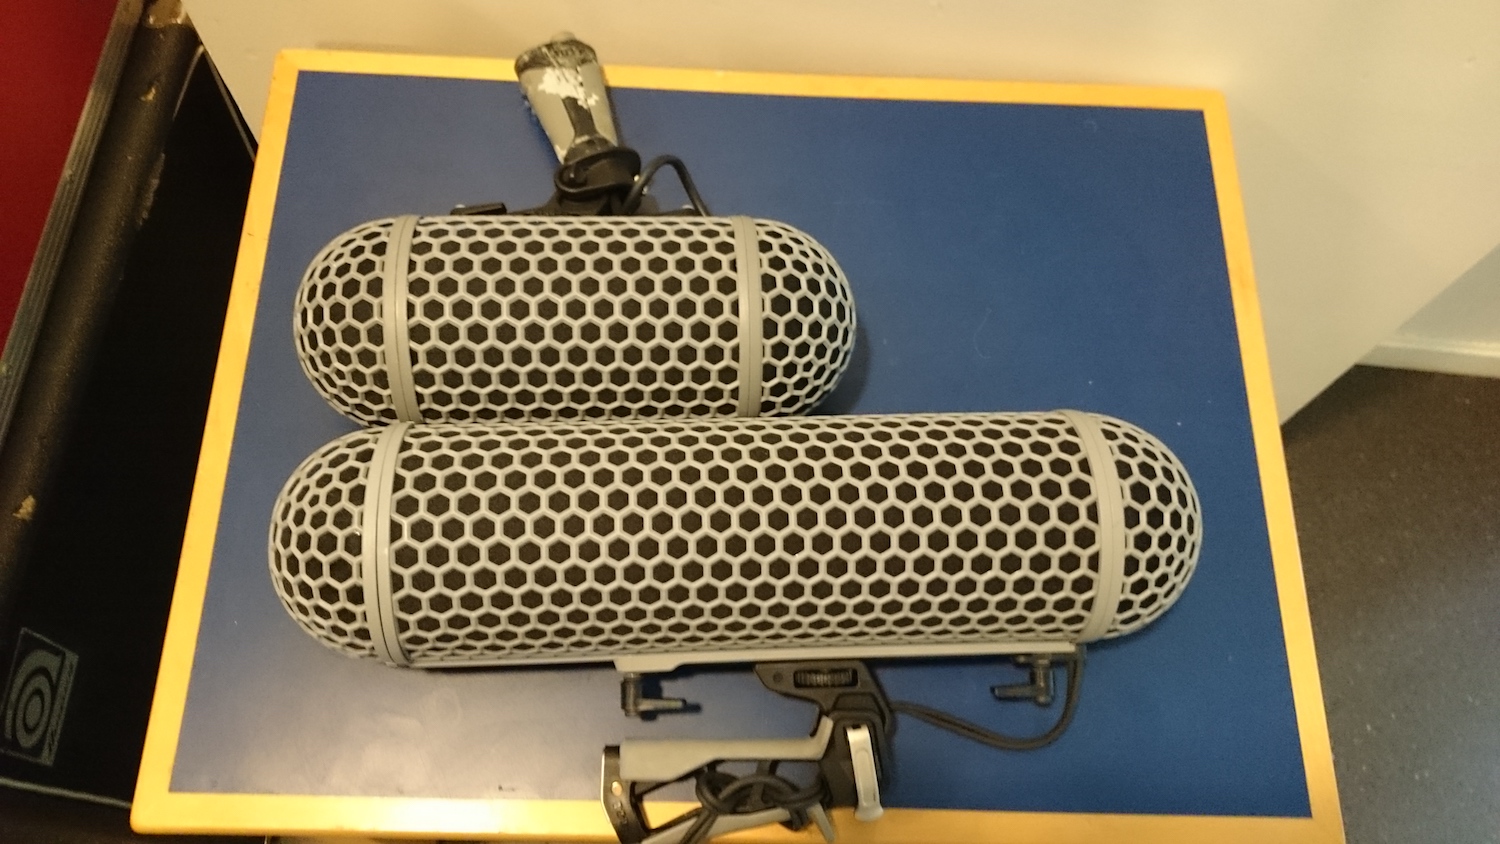
I also needed to bring some microphones. I like my Line Audio microphones. They sound good, they’re small and they are pretty cheap. The low price is a plus when the plan is to expose them to salt water. The plan is always to keep the equipment dry, but who knows what’ll happen when you’re recording close to the sea. I brought two Line Audio OM1s (omni) and two Line Audio CM3s (cardioid). The plan was to aim the cardioid mics to pick up as much detail as possible while using the omnis to get a more diffuse, or wider, sound.
The microphones would, of course, need wind protection. The Line Audio mics are small and I can easily fit two inside one windshield. So, one CM3 and one OM1 in each windshield gives me two stereo pairs using only two windshields. To save even more space, I decided to bring my modified Rode blimps. They’re short and pretty compact (I stole the idea from Watson Wu). Paired with the Manfrotto Nano lightweight mic stands, this is a pretty compact and light setup.
Location research and scouting
Now that I had a good, compact kit, it was time to do some location research. The research started at home using Google maps. I like to use Google maps and satellite images to get an idea of how to get to an area and what it’ll look like when I get there. The regular map helps me figure out how to get close by car. The satellite images gives me an idea of how easy it’ll be to haul the recording gear from the car to the actual recording location. In this case, I would be able to get pretty close by car, so I wouldn’t need to bring boots for super rough terrain or a huge backpack to carry the gear. I could just throw my Petrol bag over my shoulder, carry it to the beach and then go back to the car get the mic stands and windshields.
The first day up north I spent just driving to possible recording locations. I like to physically scout the locations without bringing the gear, if I can. I’ve found this to save time in the long run. I want the days I do the actual recording sessions to be as effective as possible. Driving to a useless location is just a huge waste of time. It turned out that a few of the locations i had found on the map were inaccessible because of fences or “no trespassing” signs. This was not visible on the map or satellite images, so there was no way of knowing without going there. Other locations were too close to fishing towns that were surprisingly noisy, both due to industrial noise and the large number of seagulls. After a day of scouting, I had a good number of locations ready for the recording session.
I decided to spread the recording session over three days. This allowed me to do a lot of the recording early in the morning and avoid tourists and other noisy visitors. It also let me record different sized waves due because the weather and wind conditions were different each day.
Lessons learned
All in all the recording sessions themselves went very well. I was pleasantly surprised by the lack of birds and bird calls in the recording locations. I only had trouble in two places and I was able to salvage those recordings in post. I have a few things I will do differently the next time:
The coast can be very windy. Although I’ve used the Rode blimps in very windy conditions before, I struggled in quite a few of the recording locations. The next time I’ll make sure to bring an extra layer of wind protection, like a Rycote hi-wind cover. I’ve written more about recording in windy conditions in this blog post.
If I had unlimited space in my suitcase, I would have brought a large bag with enough space for all the gear. An optimal setup would be a large bag with room for the recorder and mixer inside and somewhere to strap the mic stands and windshields outside. This would reduce the setup time on each location. It would also eliminate the need to disconnect the cables every time I change location. In wet and sandy conditions, you don’t really want to disconnect anything and risk getting sand or salt water inside the XLR connectors. Because I didn’t bring a large backpack, I had to disconnect every time. I didn’t have any problems because of it, but I could easily have had problems.
The wave recordings from this session will be released through Norsonant. Check it out there. Also feel free to join the mailing list to get updates on new library releases and free sounds.


