After releasing the Norsonant library “Windy forest” I saw a lot of comments online about wind being challenging and difficult to record. I don’t disagree, but I’ve picked up a few tricks over the years that help. Most of them are pretty basic, but if you know about them all it adds up and makes things easier.
Let’s start with a list of tips and then we’ll get into details.
- Correct microphone placement in the zeppelin
- Use extra layers of wind protection
- Use natural cover
- Aim the microphones at something
- Keep the microphone stand from tipping over
- Record long takes
Correct microphone placement in the zeppelin
The zeppelin works by creating a volume of still air around the microphone. For this to work properly there needs to be a little bit of distance between the microphone diaphragm and the zeppelin. I’ve seen people push the microphone all the way to the front of the zeppelin to get as close as possible to the sound source. This means that there is very little room front of the microphone and reduces the effect of the zeppelin. I generally leave as much room in front of the microphone as between the microphone and the sides of the zeppelin.
This tip only applies to microphones with the diaphragm near the front, like a Sennheiser MKH 50 or a Rode NT5. If you’re using a shotgun microphone, the design of the microphone itself will keep the diaphragm from getting close to the front end of the zeppelin.
Use extra layers of wind protection
You’re used to using a furry wind jammer to protect the microphone from the wind, but sometimes that’s not enough. I’ve tested a different ways of adding wind protection.
The most professional solution is the Rycote Hi wind cover. The Hi wind cover is made of a fleece material that slides over the zeppelin. The wind jammer goes over the Hi wind cover. The fleece material gives you an extra layer of wind protection and this has been a life saver for me many times.
The low budget solution is using a second furry wind jammer as an extra layer. Just slide an extra wind jammer over the one you’re already using and that will give the microphone some extra protection. This works, but not quite as well as the Hi wind cover.
Use natural cover
Unless you’re recording in a wide open field or something like that, you can probably find some natural cover that will help protect you and the microphone from the wind. If you’re in the city you can try to get behind a house or wall. In the forest you can find lower ground, a small valley or hide behind a big rock.
If all else fails you can position yourself between the microphone and the direction the wind comes from and use your body as wind protection. This naturally won’t work if you’re wearing loose clothing or anything that will flap around in the wind.
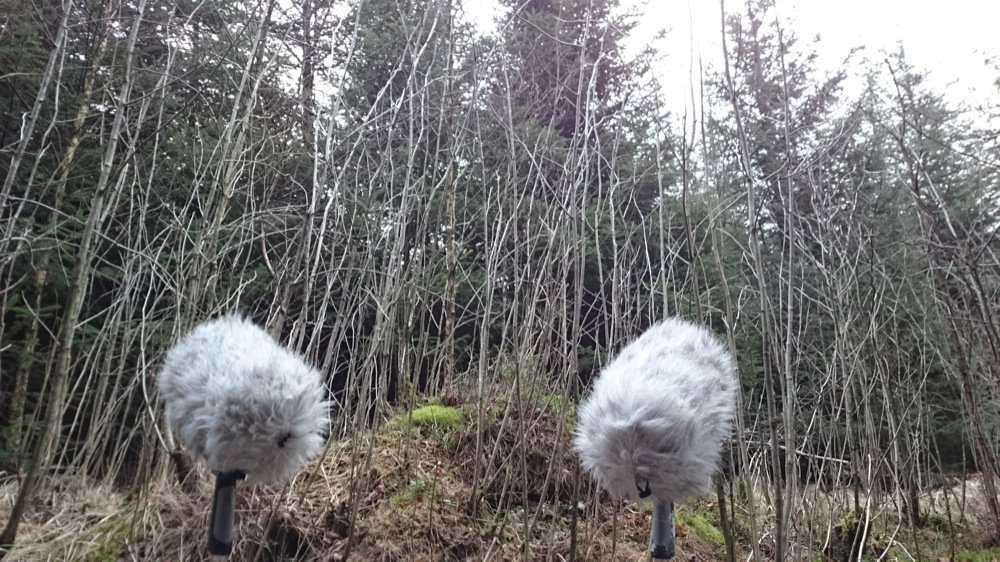
Aim the microphones at something
The air that the wind moves is not very interesting in itself. Don’t just aim the microphones at the horizon. Try to aim them at something that the wind interacts with. Aim them at a tree, straight down at the grass, at the rusty gate or at the hole in the wall that makes the wind sing. This is the same principle as when recording rain. Thousands of rain drops is just white noise. You are looking for the details that make it sound interesting.
Here’s an example from the Windy forest library. I’ve pointed the microphones straight down to capture the sound of grass moving in the wind.
Keep the microphone stand from tipping over
This should be pretty obvious, but I know I’ve let my microphone stand tip over many times. Shame on me. Zeppelins break and so do microphones, so be careful.
- Keep your foot or hand on the stand
- Place something heavy on the base of the stand
- Keep the stand low to decrease the chance of it tipping over
Record long takes
Even if you are very careful, you’ll probably get some wind distortion on your recordings. Long takes make the editing process a lot easier. Instead of having to low cut away wind distortion you can just cut away the entire section and still have plenty left to work with.
Sometimes you want both clean wind sounds and dirty, distorted wind sounds. Long takes will give you more to choose from.
That’s all the tips I have for now. If you want more you should go read Gordon Hempton’s blog post about wind recording.